Embedding a 64-bit binary in a 32-bit Windows C++ app
A while back, I ran into this tricky issue on Windows 7. I had a small Windows tray utility written in C++ that was supposed to do a few things, including checking if Microsoft Word was running and if it was the top-level app. To do this, I was using the EnumProcesses API. Here’s what that looked like:
if (::EnumProcesses(aProcesses, sizeof(aProcesses), &cbNeeded)) {
  cProcesses = cbNeeded / sizeof(DWORD);
  for (i = 0; i < cProcesses; i++) {
    if (aProcesses[i] != 0) {
      HANDLE hProcess = OpenProcess(PROCESS_QUERY_INFORMATION | PROCESS_VM_READ, FALSE, aProcesses[i]);
      if (NULL != hProcess) {
        HMODULE hMod;
        DWORD cbNeeded;
        if (::EnumProcessModules(hProcess, &hMod, sizeof(hMod), &cbNeeded)) {
          ::GetModuleFileNameEx(hProcess, hMod, processName, sizeof(processName));
Everything was going fine until one day the app couldn’t detect Word anymore. Surprise, surprise, it acted up when I ran it for the first time on Windows 7 64-bit with 64-bit Word 2010. It turned out that from a 32-bit virtualized process (running under the WOW64 subsystem), I couldn’t enumerate 64-bit processes!
There were two obvious ways to tackle this problem: a) create a 64-bit version of my tray app and distribute it separately, and b) use WMI for the job. I won’t go into too many details about why I ditched WMI. Let’s just say it’s a lot slower compared to using WIN32 APIs directly, and it makes you deal with COM. More importantly, I already had the existing code base up and running, and I didn’t want to turn everything upside-down when all I needed was to create another project file and check all the right boxes for 64-bit compilation.
So, I went with the 64-bit compilation solution, but there was still something bothering me. How could I avoid including two separate executable images in the installation package? Then I remembered something interesting I had noticed while using the super popular Process Explorer utility on 64-bit Windows, although I didn’t pay much attention to it before. Here’s what I saw:
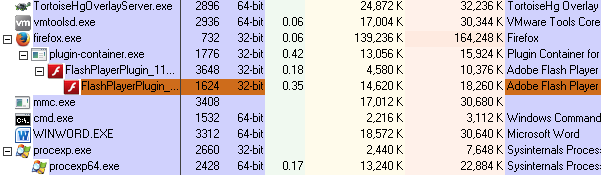
Turns out, Process Explorer creates a 64-bit version of itself, and what’s even more interesting is that the 32-bit version bundles its 64-bit counterpart as a binary resource. When procexp.exe is launched, it extracts the 64-bit binary from its resources to a temporary folder and runs it as a child process. That’s exactly what I was hoping to achieve. So, let me show you how I did it, so you can create your own self-unpacking 64-bit version of your 32-bit app!
Embedding a 64-bit binary as a resource
First things first, you’ll need to create an additional 64-bit Visual Studio configuration for your project. This configuration should compile your code to run natively on 64-bit Windows.
Next, go to your 32-bit project and, under Resources -> General properties, add something like $(SolutionDir)x64$(Configuration) to Additional Include Directories. This will allow you to reference your 64-bit binary from the .rc file.
Embedding a 64-bit binary in a 32-bit binary’s resources is quite straightforward. Just add the following code somewhere inside your .rc file:
#if !defined (_WIN64)
IDR_MYTRAYAPP64 RCDATA "MyTrayApp64.exe"
#endif
Also make sure you have the following inside the Resource.h file.
#ifndef _WIN64
#define IDR_MYTRAYAPP64              400
#endif
Feel free to replace 400 with any value that suits your needs better. Also, make sure to add the _WIN64 preprocessor constant to your 64-bit project file. If you attempt to build a 32-bit binary at this point, you’ll notice that its size has increased by the size of the 64-bit binary.
Extracting 64-bit binary
Let’s wrap up the configurations for now and dive into some code snippets that will help us extract the binary from resources and more.
We’ll begin with the trusty old entry point function, WinMain:
int APIENTRY WinMain(HINSTANCE hInstance, HINSTANCE /*hPrevInstance*/,
                    LPSTR lpCmdLine, int nCmdShow) {
...
#if defined _WIN64
  if (!getCmdOption(__argv, __argv + __argc, "-run64", out)) {
    displayMessage(hInstance, IDS_MISSING_ARG_RUN64);
    return FALSE;
  }
#endif
...
In this section, I’m reading various command line options. The code for both the 32-bit and 64-bit versions is identical, but I’m using preprocessor guards for platform-specific handling. The intention is to ensure that the 64-bit binary cannot be run independently, essentially giving a warning to accidental double-clickers.
Moving on, further down the road, we encounter something like this:
#if !defined (_WIN64)
  if (is64BitWindows()) {
    HRSRC res = ::FindResource(hInstance, MAKEINTRESOURCE(IDR_MYTRAYAPP64), RT_RCDATA);
    if (!res) {
      LOG(ERROR) << "unable to find embedded resource MyTrayApp64.exe";
      return false;
    }
    HGLOBAL resHandle = ::LoadResource(NULL, res);
    if (!resHandle) {
      LOG(ERROR) << "unable to load resource MyTrayApp64.exe";
      return false;
    }
    char *resData = (char*)::LockResource(resHandle);
    DWORD resSize = ::SizeofResource(NULL, res);

    char tempPath[MAX_PATH + 1];
    DWORD tempPathSize = ::GetTempPath(MAX_PATH, tempPath);
    if (tempPathSize == 0 || tempPathSize > MAX_PATH) {
      LOG(ERROR) << "unable to get path to temporary folder";
      return false;
    }

    string targetPath(tempPath);
    targetPath.append("MyTrayApp64.exe");
    ofstream outputFile(targetPath, std::ios::binary);
    outputFile.write((const char *)resData, resSize);
    outputFile.close();
Is64BitWindows is a small utility function that returns true if our normal 32-bit process is being run from the WOW 64-bit subsystem i.e. 64-bit Windows.
#if !defined (_WIN64)
  bool is64BitWindows() {
    BOOL f64 = FALSE;
    return ::IsWow64Process(::GetCurrentProcess(), &f64) && f64;
  }
#endif
The next step involves loading and locking a specific resource and then writing it to a file in a temporary folder. That part was easy! However, before running that image, there’s one more small thing to do: creating a new job object and assigning my currently running process to it.
HANDLE job = NULL;
if (processInJob == 0) {
  job = ::CreateJobObject(NULL, NULL);
  if (NULL == job) {
    LOG(ERROR) << "unable to create job object";
    return false;
  }

  JOBOBJECT_EXTENDED_LIMIT_INFORMATION jeli;
  ::ZeroMemory(&jeli, sizeof(jeli));
  jeli.BasicLimitInformation.LimitFlags = JOB_OBJECT_LIMIT_KILL_ON_JOB_CLOSE |
    JOB_OBJECT_LIMIT_BREAKAWAY_OK;
  if (0 == ::SetInformationJobObject(job, JobObjectExtendedLimitInformation,
                                    &jeli, sizeof(jeli))) {
    LOG(ERROR) << "unable to setup job object";
    ::CloseHandle(job);
    return false;
  }

  if (0 == ::AssignProcessToJobObject(job, ::GetCurrentProcess())) {
    LOG(ERROR) << "could not assign process to job object, error: " << ::GetLastError();
    ::CloseHandle(job);
    return false;
  }

  LOG(INFO) << "assigned process pid " << ::GetCurrentProcessId() << " with a job";
}
If a process is included in the job, any other child processes I create afterward will also become part of the same job. An intriguing flag here is JOB_OBJECT_LIMIT_KILL_ON_JOB_CLOSE, which essentially means that if the parent process terminates, all its children will also be terminated. This way, I don’t have to concern myself with the 64-bit process lingering after its counterpart has exited.
Creating a 64-bit process
Lastly, I can create a 64-bit process:
STARTUPINFO si;
PROCESS_INFORMATION pi;
ZeroMemory(&si, sizeof(si));
si.cb = sizeof(si);
ZeroMemory(&pi, sizeof(pi));

string params(lpCmdLine);
params.append(" -run64 \"\"");

LOG(INFO) << "starting 64 bit app";
if (::CreateProcess(targetPath.c_str(), const_cast<char*>(params.c_str()),
                    NULL, NULL, TRUE, 0, NULL, NULL, &si, &pi)) {
  LOG(INFO) << "waiting for 64 bit app to exit";
  ::WaitForSingleObject(pi.hProcess, INFINITE);
  ::CloseHandle(pi.hThread);
  ::CloseHandle(pi.hProcess);
  if (NULL != job)
    ::CloseHandle(job);
}
One interesting point to observe here is that after creating the 64-bit process, I promptly initiated the waiting process for its termination. This might seem a bit odd, but it sets the stage for the concept of running both versions of the app simultaneously (hence the use of the job). How they will communicate is something you’ll need to determine based on your specific requirements.
Conclusion
In a nutshell, this clever method of embedding a 64-bit binary within a 32-bit Windows C++ application solves the problem of detecting and running on 64-bit systems. By following the steps detailed in this article, you can have a single codebase that smoothly adapts to both architectures. The nifty use of job objects and process management helps you control the execution of both 32-bit and 64-bit parts of your application. Happy coding!